

Common Wallpaper Installation Mistakes to Avoid
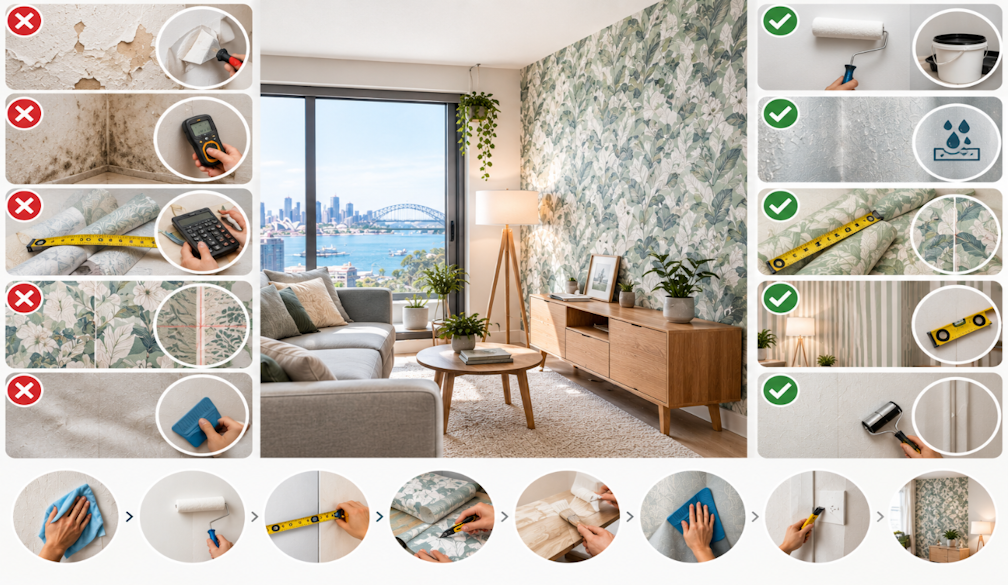
Wallpaper can completely change a room, but only when it's installed well. A visible seam, a bubble that won't flatten or a pattern that drifts out of line can undo the whole effect, and most of these problems trace back to a handful of avoidable mistakes made before or during installation. Whether you're papering a feature wall yourself or planning a bigger project, knowing what usually goes wrong helps you avoid paying for the same job twice.
This guide walks through the most common wallpaper installation mistakes, why they happen, and how to prevent them.
Mistake 1: Skipping Wall Preparation
This is the biggest cause of failed wallpaper. Paper applied over dust, grease, flaking paint, old adhesive or cracks will lift, bubble or show every imperfection underneath.
How to avoid it: Clean the wall, fill and sand cracks and holes, remove loose paint, and let everything dry fully. Most walls also benefit from a wallpaper primer or sealer, which improves adhesion and makes future removal easier.
Mistake 2: Ignoring Moisture Problems
Papering over damp, mould or a slow leak traps moisture behind the paper. Bubbling, staining, a musty smell and mould growth soon follow, and the wallpaper has to come off again.
How to avoid it: Look for stains, peeling paint, condensation or a musty smell before you start. Find and fix the source first, and let the wall dry completely.
Mistake 3: Measuring Poorly and Ordering Too Little
Running short halfway through a job is a common and expensive problem. Different batches of the same wallpaper can vary slightly in colour, so a reorder may not match what's already on the wall.
How to avoid it: Measure wall height and width carefully, allow extra for trimming and pattern repeat, and order all rolls from the same batch, with a spare roll for future repairs.
Mistake 4: Not Accounting for Pattern Repeat
Large or drop match patterns need careful planning. Cutting strips without checking the repeat leads to mismatched designs at the seams and a lot of wasted paper.
How to avoid it: Read the pattern repeat information on the roll, lay strips side by side before cutting, and plan where the pattern starts so the most prominent element sits well in the room.
Mistake 5: Starting Without a Straight Guide Line
Walls, ceilings and corners are rarely perfectly straight, especially in older buildings. Using a corner or the edge of a window as your guide often makes the first strip drift, and the error grows across the wall.
How to avoid it: Use a spirit level or plumb line to draw a vertical guide line, and start from there rather than from a corner.
Mistake 6: Using the Wrong Adhesive or Applying It Badly
Different wallpapers need different adhesives. Too little paste leaves dry patches that lift, while too much causes bubbling, slipping and stretched paper. Using a paste that doesn't suit the paper, such as a heavy vinyl or a non-woven wallpaper, can cause failure later.
How to avoid it: Follow the manufacturer's instructions on adhesive type, coverage and booking time, the short rest period some papers need after pasting before they go on the wall.
Mistake 7: Trapping Air Bubbles and Creases
Bubbles form when air or excess paste gets trapped behind the paper, and creases appear when strips are pushed on with too much force or at the wrong angle.
How to avoid it: Smooth each strip from the centre outward with a wallpaper smoother, working gently. Fix small bubbles straight away while the adhesive is still workable. Pushing too hard can stretch or damage delicate papers.
Mistake 8: Overlapping or Leaving Gaps at Seams
Seams that are too tight overlap and show ridges, while seams that are too loose leave gaps that expose the wall and can curl over time.
How to avoid it: Butt strips together edge to edge without stretching the paper, and use a seam roller lightly once the paste has set enough. Wipe away excess adhesive with a clean damp sponge before it dries.
Mistake 9: Cutting Around Switches, Sockets and Edges Poorly
Rushed trimming leaves ragged edges around power points, skirting boards, architraves and ceilings.
How to avoid it: Switch off power and remove cover plates before papering. Use a sharp blade, change it often, and trim against a straight edge. A dull blade tears the paper.
Mistake 11: Ignoring Room Conditions
High humidity, direct sun, drafts and rapid temperature changes can affect how paste dries and how paper sits. This matters in Sydney summers, when heat and humidity can dry adhesive too fast or too slowly.
How to avoid it: Install on a mild day with good ventilation, and avoid direct sun on the wall while you work.
Mistake 12: Choosing the Wrong Wallpaper for the Room
A delicate paper in a busy hallway or a standard paper in a steamy bathroom won't last. Wallpaper choice should reflect how the room is used.
How to avoid it: Choose washable or vinyl finishes for kitchens, bathrooms and high traffic areas, and reserve delicate textured or natural materials for low traffic rooms.
DIY vs Professional Installation: Which Makes Sense?
|
Factor |
DIY |
Professional |
|
Cost |
Lower upfront |
Higher upfront, less risk of waste |
|
Best for |
Small feature walls, simple patterns |
Large areas, matched patterns, murals, ceilings |
|
Risk |
Higher chance of bubbles, seam and pattern issues |
Lower, backed by experience |
|
Time |
Longer for beginners |
Faster and cleaner |
For larger rooms, expensive wallpaper, or complicated layouts, many owners choose professional wallpaper installation Sydney services to get seams, alignment and wall prep right the first time, especially when the wallpaper is costly and errors can't be undone.
What to Do If Something Has Already Gone Wrong
Not every mistake means starting over. Lifted seams can often be re-adhered, small bubbles can be slit and re-pasted, and isolated tears can be patched. If the damage is widespread or linked to moisture, professional wallpaper repair Sydney help can assess whether a repair is enough or whether the affected section needs replacing.
Frequently Asked Questions
Why is my wallpaper bubbling after installation?
Trapped air, excess adhesive, poor wall preparation or moisture behind the paper are the usual causes. Small bubbles from paste sometimes settle as the paper dries, but persistent ones need repair.
Why are my wallpaper seams peeling?
Weak adhesion at the edges, dusty walls, too little paste or high humidity are common causes. Most lifted seams can be re-adhered.
Do I need to prime the wall before wallpapering?
In most cases, yes. A primer improves adhesion, seals the surface and makes removal easier later.
Can I fix wallpaper installation mistakes myself?
Minor issues like small bubbles or a lifted seam usually can be fixed at home. Pattern mismatches, widespread peeling and moisture damage are better assessed by a professional.
How long should I wait before judging the result?
Wallpaper often looks different once it has fully dried, usually after 24 to 48 hours, so wait before deciding a bubble or seam needs fixing.
Final Thoughts
Most wallpaper problems come from rushed preparation, poor planning or the wrong materials rather than the wallpaper itself. Prepare the wall properly, measure carefully, use the right adhesive, take your time with seams and patterns, and match the wallpaper to the room. If the project is large or the wallpaper is expensive, bringing in a professional can save you far more than it costs.


